One thing is certain: customers love discounts. As a retailer, you can use them in a variety of ways in your strategy. For example, new buyers can try out your products first with introductory offers and see for themselves before paying full price later. You can also reward existing customers for their loyalty or encourage occasional customers to visit your store again with a discount code.
Shopify offers a powerful discount functionality that D2C and well-known brands rely on. In our guide, we'll show you step-by-step how to create and optimally use discounts in Shopify to boost the success of your online store and increase customer loyalty.

Our e-commerce expert Adrian has already helped numerous brands launch on Shopify. In his book, Shopify for Dummies, he provides retailers with all the essential information they need to navigate Shopify ( view on Amazon / view at your local bookstore ).
He also hosts the Merchant Inspiration podcasts and webinars, where he regularly exchanges ideas with the community's most well-known faces.
Add discounts to Shopify - In 3 steps:
1. Select discount type

You can find the “Discounts” section in the Shopify Admin. Here you have the option to create and manage new discounts.
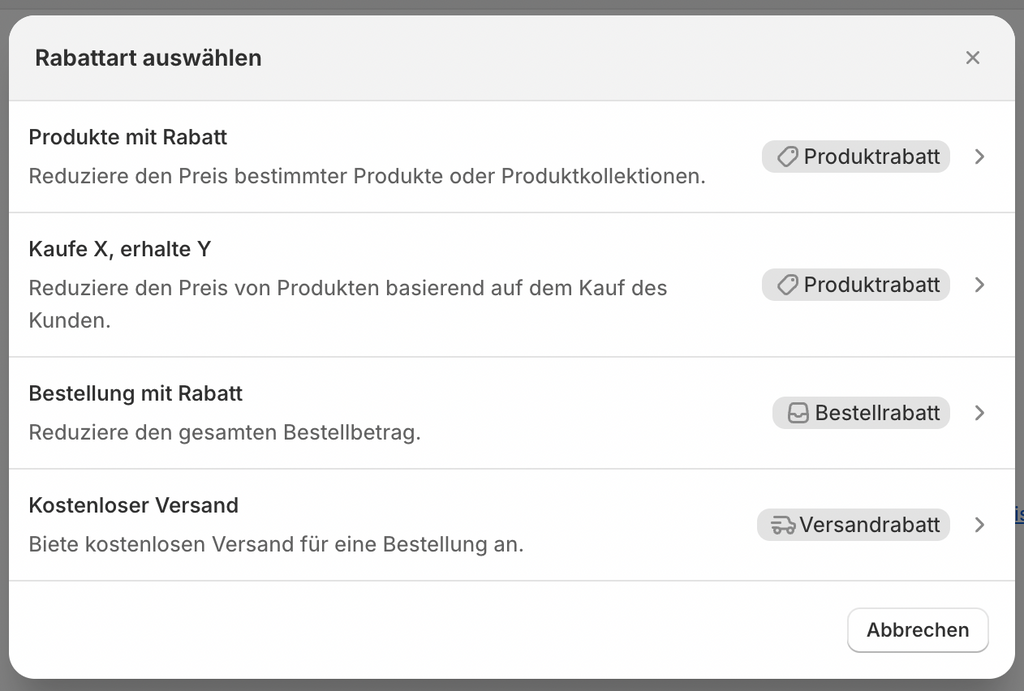
If you click "Create Discount," you can choose from four different discount types for Shopify in the pop-up. These include:
- Product with discount: Set a discount value for specific products or categories.
- Buy X, Get Y: This discount type offers several advantages. It's ideal for increasing customer loyalty, drawing attention to new products, or linking slow-selling products to your bestsellers. You can set rules for this discount, such as a minimum order value for customers to receive a free gift. You can also offer customers a free product when they purchase a specific product or a product from a category.
- Order with discount: Set a discount value that applies to your customers' entire order.
- Free shipping: Here you can apply a discount on the shipping costs.
2. Create a discount
Let's take a closer look at how you can create a free shipping discount on Shopify.
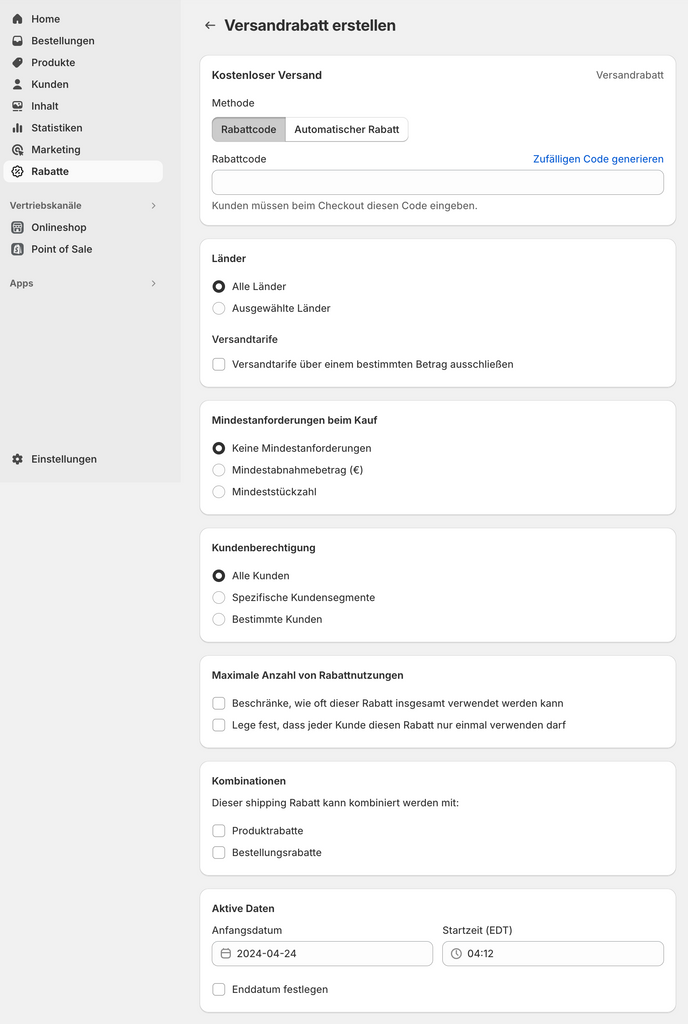
In the following screen you can name your discount and make certain settings.
- Countries: Specify whether the discount should be limited to certain countries, such as the German-speaking area.
- Minimum requirements: Define conditions such as minimum unit value or order value.
- Customer eligibility: Decide whether the discount should be available to all customers or only to specific customer groups such as VIPs or B2B customers.
- Conditions: Decide how often the discount can be redeemed. You can also specify whether customers can combine the discount with other discounts.
- Time limit: Set the active period of the discount.
Check your entries and then save the discount.
Creating the other discount types follows the same pattern. Adrian provides an overview in this video tutorial:
This video is from the Shopify Masterclass on VisualMakers . Adrian teaches you everything you need to get started with Shopify.
3. Make discount settings
Once you've created discounts, you'll find a complete list of them in the Shopify admin under the "Discounts" menu, including activity status, discount type, combinability, and number of uses. You can make adjustments by clicking on a discount.
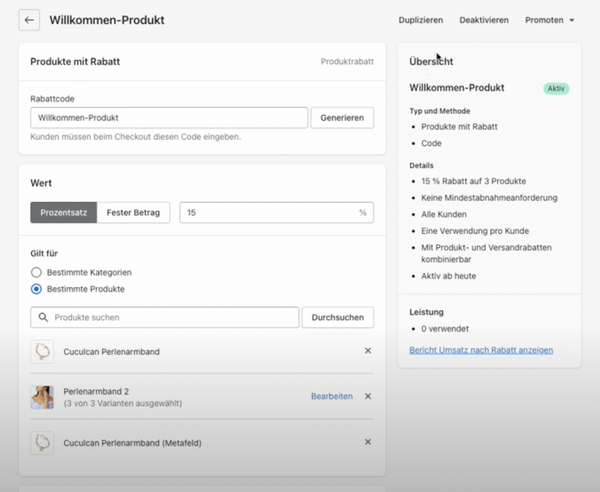
Two settings are particularly useful here:
- Deactivate: If you want to deactivate your discount, you can deactivate it with one click. This will prevent your discount from expiring and customers from redeeming it.
- Promote: If you redirect customers to your shop from ads or social media posts, you can create a shareable link. When customers access the shop via this link, the discount code will be automatically saved and applied.